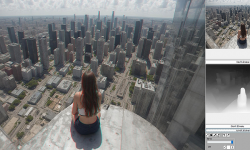
The program we will be working with is called Now3D. It is easy to create models of various objects and complete scenes, select appropriate colours and textures, choose lights, place cameras on the scene and then 'capture' the image. If you use two cameras a short distance apart, you get two images - and from these you can then compose a 3D/stereoscopic image.
You can download Now3D on this page - select Download files in the left menu and then click on the computer icon in the first table on the right. Run the downloaded file to install it. And then you can start working.
This program seems to be working even 20 years since we first wrote about it.
Creating 3D objects
At the beginning of each work, there is a camera on an almost empty stage that will capture your work (and at the appropriate time you will use it to create the final image) and one light that will illuminate the scene.
Once you've decided what will be in your 3D image, you can start creating objects. For starters, let's say we place three spheres in the scene. To create any object, either choose Object/Add from the menu or right-click Objects in the scene description (Scene window) and choose Add from the menu that appears. Click on the selected object (sphere, cube, etc.) and select the level of detail (1-6) - you can leave the standard level 3 to start with.
A number of newer and more sophisticated programs are now available for high quality stereoscopic rendering. But the basic principles are still the same.
The object is placed on the scene. If you haven't changed the window layout in the program, then in the top left you see the view of the scene as the camera sees it, next to the top view, bottom left the right view and right the front view. You can move, rotate, or zoom in and out of each object in the scene with the mouse. The action you want to perform is selected via a trio of buttons on the top bar - next to the floppy disk button (for saving data).
You can move objects in any of the views. An object is selected by double-clicking the mouse and the selected object has a red 'cage' around it.
Colors and textures
You can assign colors or textures to objects to make them look the way you want. Just right-click on Materials in the Scene window and choose Add. A bottom window appears with the title Materials, where you can select the Color tab, here the Picture properties, and here you can click to the right of the Picture to select the image on the disk that you want to cover an object. (If the Color item is not visible, it is hidden behind the others and needs to be discovered - for example, by clicking on other items.)
Once you have created a new material in this way, you can apply it to any of the objects in the scene. Click on the object and then right-click on your material in the Scene window (it will be under Materials, if it doesn't appear you need to click on the + sign next to Materials). In the menu that appears, select Elaborate and here Assign Material to... (instead of the three dots, the name of the selected object).
Lights
Similar to the material, by clicking on Lights in the Scene window and selecting Add, you can create a new light. For starters, you may want to not just let it stand in the space, but place it in the object - so it's easily visible. To do this, right-click on the light you've created in the Scene window and choose Elaborate, then Assign Light to...
The lights appear as simple yellow stars in the scene - and you can move them around easily too.
3D image
Similar to the lights, by clicking on Cams in the Scene window and selecting Add, you can create a new camera. There is always one in the scene at the beginning of the work, we will need two - one for the left and one for the right eye - we are creating a 3D image after all.
Place the cameras next to each other - either by dragging with the mouse or by clicking on the camera in the list in the Scene window and in the lower window by clicking on Position and changing the parameters x, y, z. For example, you can set the parameters for one camera to 0, 0, -7000 (the standard position of the first camera) and for the second camera to -145, 0, -7000. Objects are normally placed at the 0, 0, 0 position, when you move them towards the camera, you should always remember that they should not be too close (remember the rule of 30x - the distance of the cameras should be at most 1/30 of the distance from the nearest object).
Now click on the left camera (e.g. in the list in the Scene window), select RayTracing in the lower window and set Use with RayTracing to True here. This tells that the resulting image will be taken by this camera. Now click on the Render button in the top bar (it's right next to the Explorer logo button) and let the left camera take the shot. Once it's created, save it to disk (use the floppy disk button in the image window).
Follow the exact same procedure described in the previous paragraph for the right camera. Now just run 3DJournal and put the images together. Remember that if you move the horizontal images relative to each other so that the objects in the front overlap, the whole image will appear to be behind the screen; if the objects in the background overlap, the objects in the front may appear to be in front of the screen.
Final remarks
In this article, of course, we couldn't possibly describe all the possibilities that Now3D offers. You will definitely find it useful to change the size of the resulting image (for each camera, the RayTracing/Window Size item) or change the camera direction (for the Rotation camera - note that both cameras should point in the same direction).
For both lights and objects you will probably use changing their color (Color, set in the red, green, blue components - R, G, B), for objects you can also modify the shape of their surface (by setting the image to the so-called Bump Mapping for the material). More complex objects (e.g. planet surfaces) can be created using plug-ins or imported.
With Now3D, you can finally create simple 3D animations for the first time: just take a 3D picture, then move an object, take another picture, and so on. The series of frames (which creates the impression of an animation) can then either be viewed in quick succession in a browser or placed in an animated gif, for example.
3DJournal, October 2003